

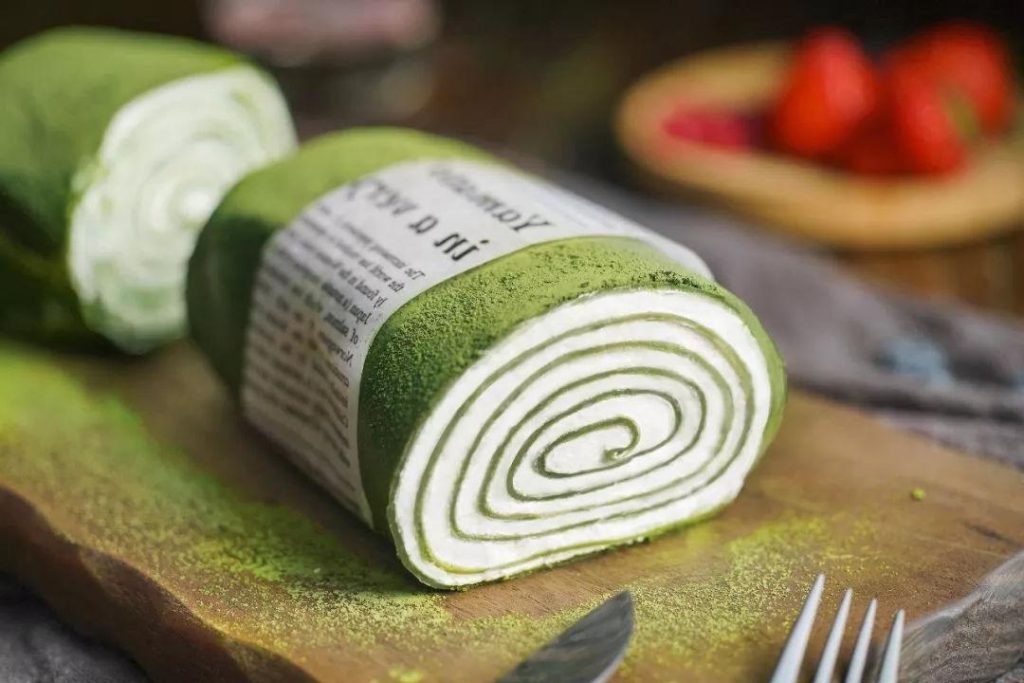
Imagine sharing something truly special with someone you cherish—a dessert that’s as beautiful to look at as it is delicious to eat. Our matcha crepe roll is exactly that kind of creation. Often called a “towel roll cake” because of its distinctive wrapped appearance, this dessert combines the delicate texture of paper-thin matcha crepes with rich, sweetened cream. What makes it perfect for couples isn’t just its taste, but the experience: cutting a slice reveals the beautiful layers, and that first bite brings together the gentle bitterness of high-quality matcha powder with the cool sweetness of whipped cream. Best of all, you don’t need special equipment—just a good non-stick pan and a little patience.
Crafting the Perfect Matcha Crepes
The foundation of any great matcha crepe roll is, of course, the crepes themselves. These should be thin, flexible, and carry the distinctive flavor and color of matcha.
The Essential Batter Formula
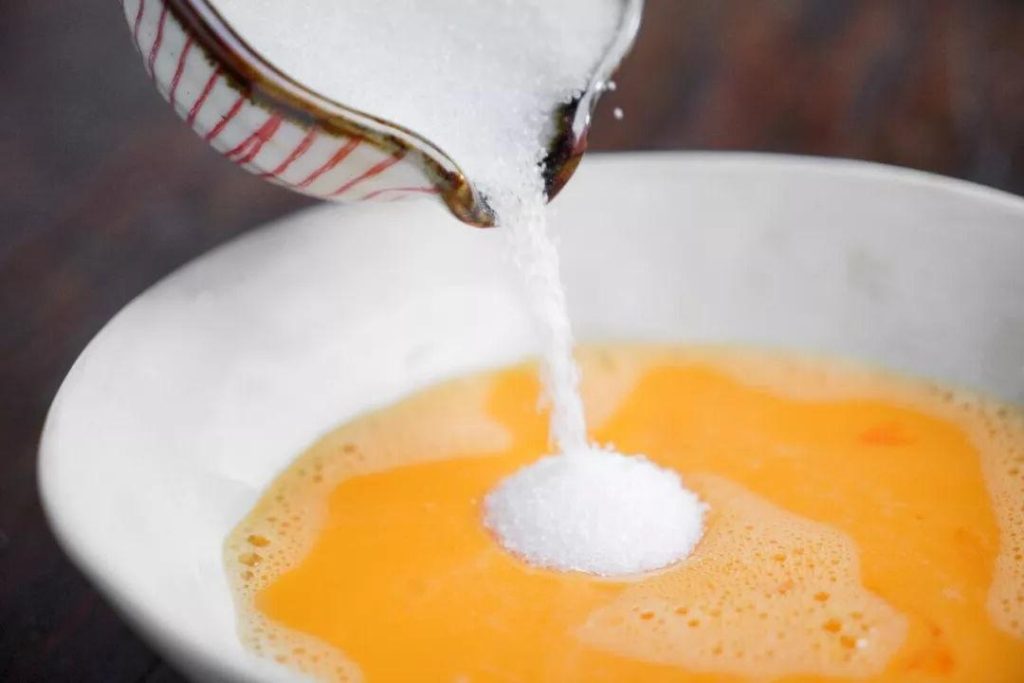
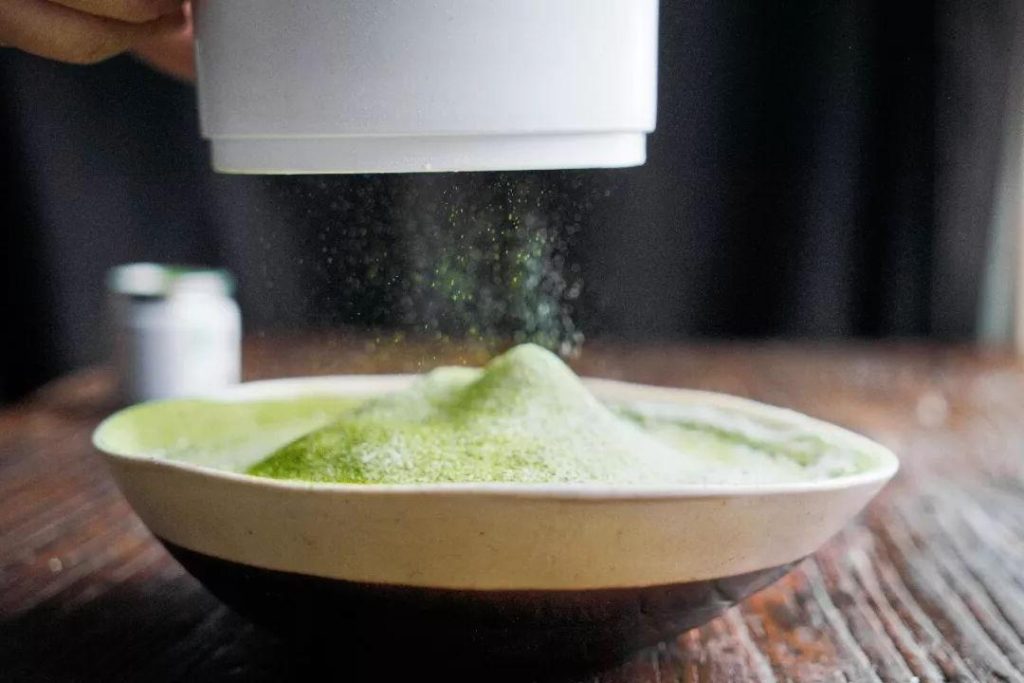
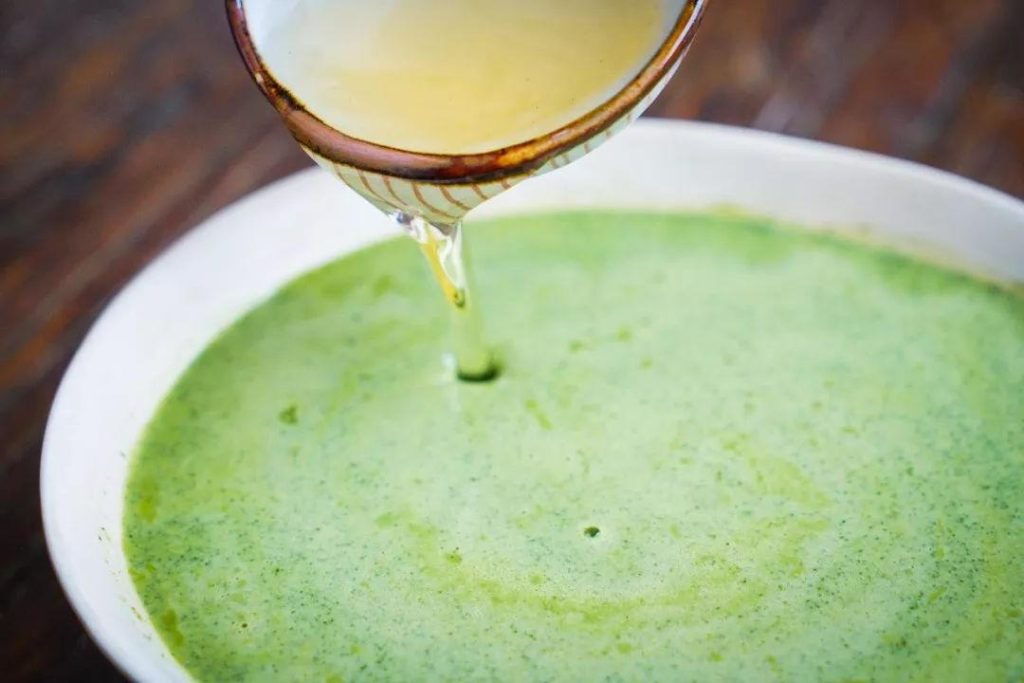
Creating the perfect batter is simpler than you might think. Start by whisking 3 large eggs in a bowl. Gradually add 50g of fine sugar in three additions, mixing well each time. Next, pour in 280ml of milk. Now for the dry ingredients: sift 100g of cake flour (low-protein flour) together with 8g of high-quality matcha powder directly into the wet mixture. This sifting step is crucial—it prevents lumps and ensures even distribution of the matcha. Finally, stir in 25ml of a neutral-tasting oil (like vegetable or canola oil) until just combined. 
The Secret to Smooth Crepes
Here’s a pro tip that makes all the difference: always strain your batter through a fine-mesh sieve. This removes any tiny lumps and guarantees perfectly smooth, restaurant-quality crepes. Let the batter rest for about 15 minutes while you prepare your cooking station.
Cooking Crepes Like a Pro
With your batter ready, it’s time to transform it into delicate crepes.
Temperature Control is Key
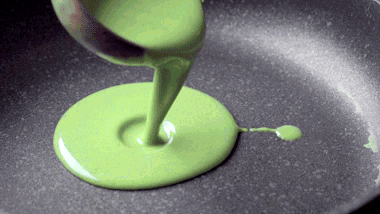
Heat your non-stick pan over low to medium heat. The ideal temperature is around 120°C (248°F)—hot enough to cook the crepe quickly but not so hot that it browns or becomes brittle. Test by sprinkling a few drops of water; they should sizzle gently.
The Swirl Technique
Pour about ¼ cup of batter into the center of the pan. Immediately lift and tilt the pan in a circular motion, allowing the batter to spread evenly into a thin, round layer. This technique takes a little practice but ensures consistently thin crepes.
Timing and Handling
Cook for about 1-2 minutes until the edges begin to lift slightly and the surface looks dry. The crepe should release easily from the pan without sticking. Transfer each cooked crepe to a cooling rack or parchment paper, separating them with parchment if stacking. Let them cool completely before assembly—warm crepes will melt your cream filling.

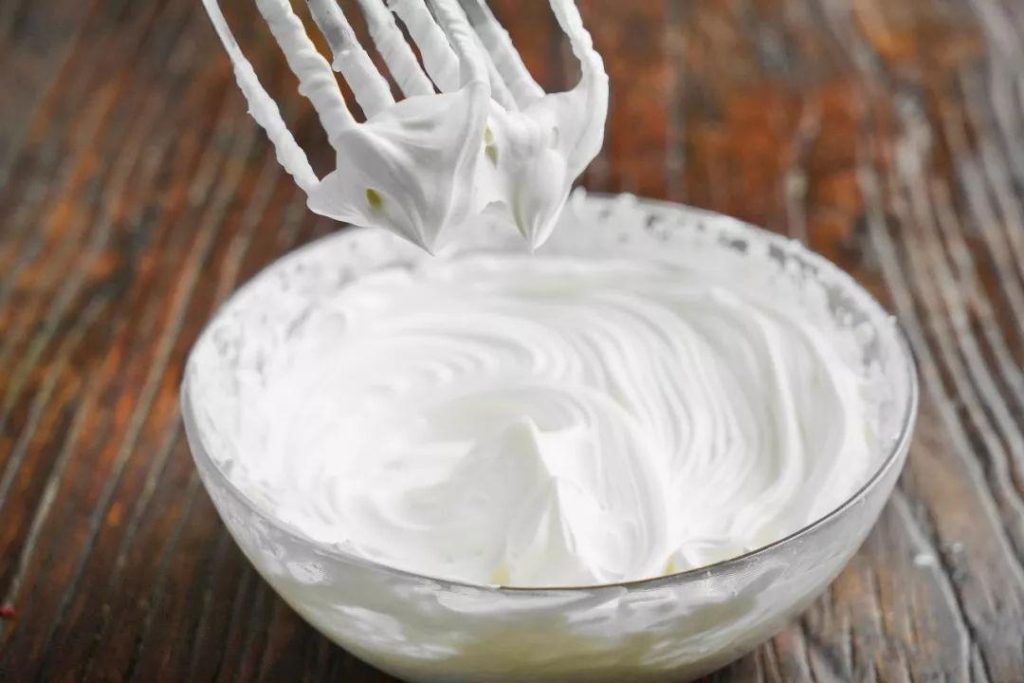
The Whipped Cream Filling
While your crepes cool, prepare the simple yet luxurious filling that holds your matcha crepe roll together.
Choosing Your Cream
Use 200ml of heavy whipping cream (at least 35% fat content) that’s well chilled. Cold cream whips better and holds its shape longer. Add 20g of fine sugar—adjust slightly based on your sweetness preference.
Achieving the Perfect Consistency
Using an electric mixer or whisk, beat the cream and sugar together until you reach stiff peaks. The cream should be thick enough to hold its shape when you lift the beaters, forming distinct peaks that don’t droop. This stability is essential for your roll to hold together when sliced.
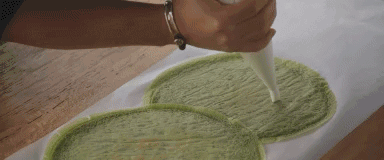
Assembling Your Matcha Crepe Roll
This is where the magic happens and your dessert takes its distinctive “towel roll” shape.
The Layering Process
Lay a large piece of parchment paper or plastic wrap on your work surface. Place your first crepe near the bottom edge. Spread a thin, even layer of whipped cream over about two-thirds of the crepe, leaving the top third bare. Place the next crepe slightly overlapping the first, and repeat the process. Continue until you’ve used all your crepes, maintaining that consistent cream layer pattern.
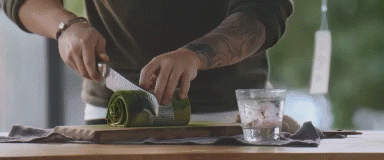
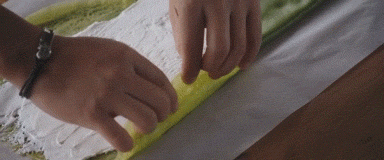
The Art of Rolling
This technique creates the beautiful layered effect. First, fold in the bare left and right edges of your crepe stack. Then, starting from the bottom (the end with cream), carefully but firmly roll the crepes forward, using the parchment paper to help guide and tighten the roll. Think of rolling a sushi mat—firm but gentle pressure creates the best shape.
Setting for Success
Wrap your completed roll tightly in the parchment paper or plastic wrap, twisting the ends like a candy wrapper. Refrigerate for at least one hour—this allows the cream to set and the flavors to meld, making the roll much easier to slice cleanly.
The Final Flourish: Presentation
When ready to serve, unwrap your beautiful matcha crepe roll and transfer it to a serving plate. For that authentic finishing touch, dust the top generously with more matcha powder using a fine sieve. For an extra special presentation, you can tie a ribbon of decorative parchment paper around the roll or garnish with fresh berries.
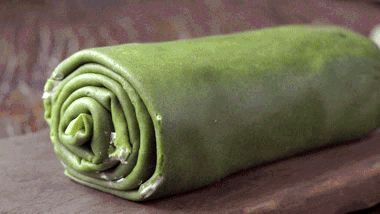
Why This Dessert Wins Hearts
This matcha crepe roll succeeds because it balances sophistication with approachability. The matcha provides a sophisticated, slightly bitter note that contrasts beautifully with the sweet cream, appealing to adult palates. Visually, the cross-section reveals stunning green-and-white layers that impress guests. Most importantly, it’s meant to be shared—each slice is a perfect portion for two to enjoy together, making it more than just dessert; it’s a sweet moment of connection.
Pro Tips for Your Best Matcha Crepe Roll
- Quality Matters: Invest in good culinary-grade matcha powder for the best color and flavor.
- Patience Pays: Don’t rush the crepe cooking—low and slow gives you perfect texture.
- Chill Out: Ensure both your cream and mixing bowl are cold before whipping.
- Clean Cuts: Use a sharp knife dipped in hot water and wiped clean between slices for perfect presentation.
Creating this matcha crepe roll is an act of care—for your craft and for the person you’ll share it with. It’s proof that the most memorable desserts aren’t necessarily the most complicated, but those made with attention and meant to be enjoyed together. So gather your ingredients, prepare to get a little green powder on your fingers, and create something truly special.